

Article
How to Clean Hearing Aids at Home: 5 Steps to Follow


Keeping your hearing aid clean is vital for enjoying clear sounds daily. Knowing which steps to take and the supplies you need is even more important.
Given the small, complex electronic parts of this equipment, you may be intimidated by the thought of cleaning them. After all, what if you make a mistake and it breaks?
Don’t worry. Cleaning your hearing aids at home is a matter of collecting a few household supplies, taking your time, and following a proven method. Read now to master the process of cleaning your device at home.
What to consider before cleaning your hearing aids
Before you clean your hearing aid, there are several points to acknowledge.
It’s essential to familiarize yourself with the cleaning instructions that came with your hearing aid. Different types of hearing aids have slightly different care needs.
For example, behind-the-ear (BTE) devices have small tubes that need to be washed, as opposed to in-the-canal (ITC) aids that don’t have tubing. It also determines whether or not you need additional cleaning supplies.
Next, create a clean and organized workspace. An open, flat surface reduces the risk of small parts getting lost or damaged. Make sure your hands are clean and dry before handling each piece.
Finally, using the right hearing aid cleaning tools–and investing in any you don’t yet have–makes for efficient work. Such tools put all components of your hearing aid within reach and keep you hearing effortlessly for weeks.
Supplies needed for cleaning hearing aids
The list of equipment required to clean your hearing aid at home is not as lengthy as you think. The supplies needed to clean your hearing aid efficiently are:
- A pair of dry microfiber clothes
- A wax pick or loop
- A cleaning brush
- Hearing aid disinfectant
- An electronics multi-tool
The microfiber cloth is used to wipe down your hearing aid’s exterior, while the wax pick or loop is used to remove any wax buildup in the device’s crevices.
The cleaning brush is used to gently brush away any debris that may have accumulated in the hearing aid’s microphone or speaker, such as dead skin cells. Finally, the extra cloth pairs with the disinfectant, and the optional multi-tool is useful if your hearing aid has more parts than usual.
Your cleaning brush should be firm yet malleable, so a nylon or polyester brush is spot on. Hearing aid disinfectant is primarily surfactant, which breaks up accumulated material on a surface. If you’ve never purchased this before, you can find it online or at your local drugstore.
5 steps for cleaning hearing aids
Now that you’ve collected your supplies, it’s time to clean your hearing aid. Continue with the following steps to get your device sparkling clean.
1. Turn your device off
Turn off your hearing aid and remove the battery before cleaning it. This is essential for a safe cleaning process. Keeping your device off prevents any damage that may occur from accidentally pressing buttons and switches.
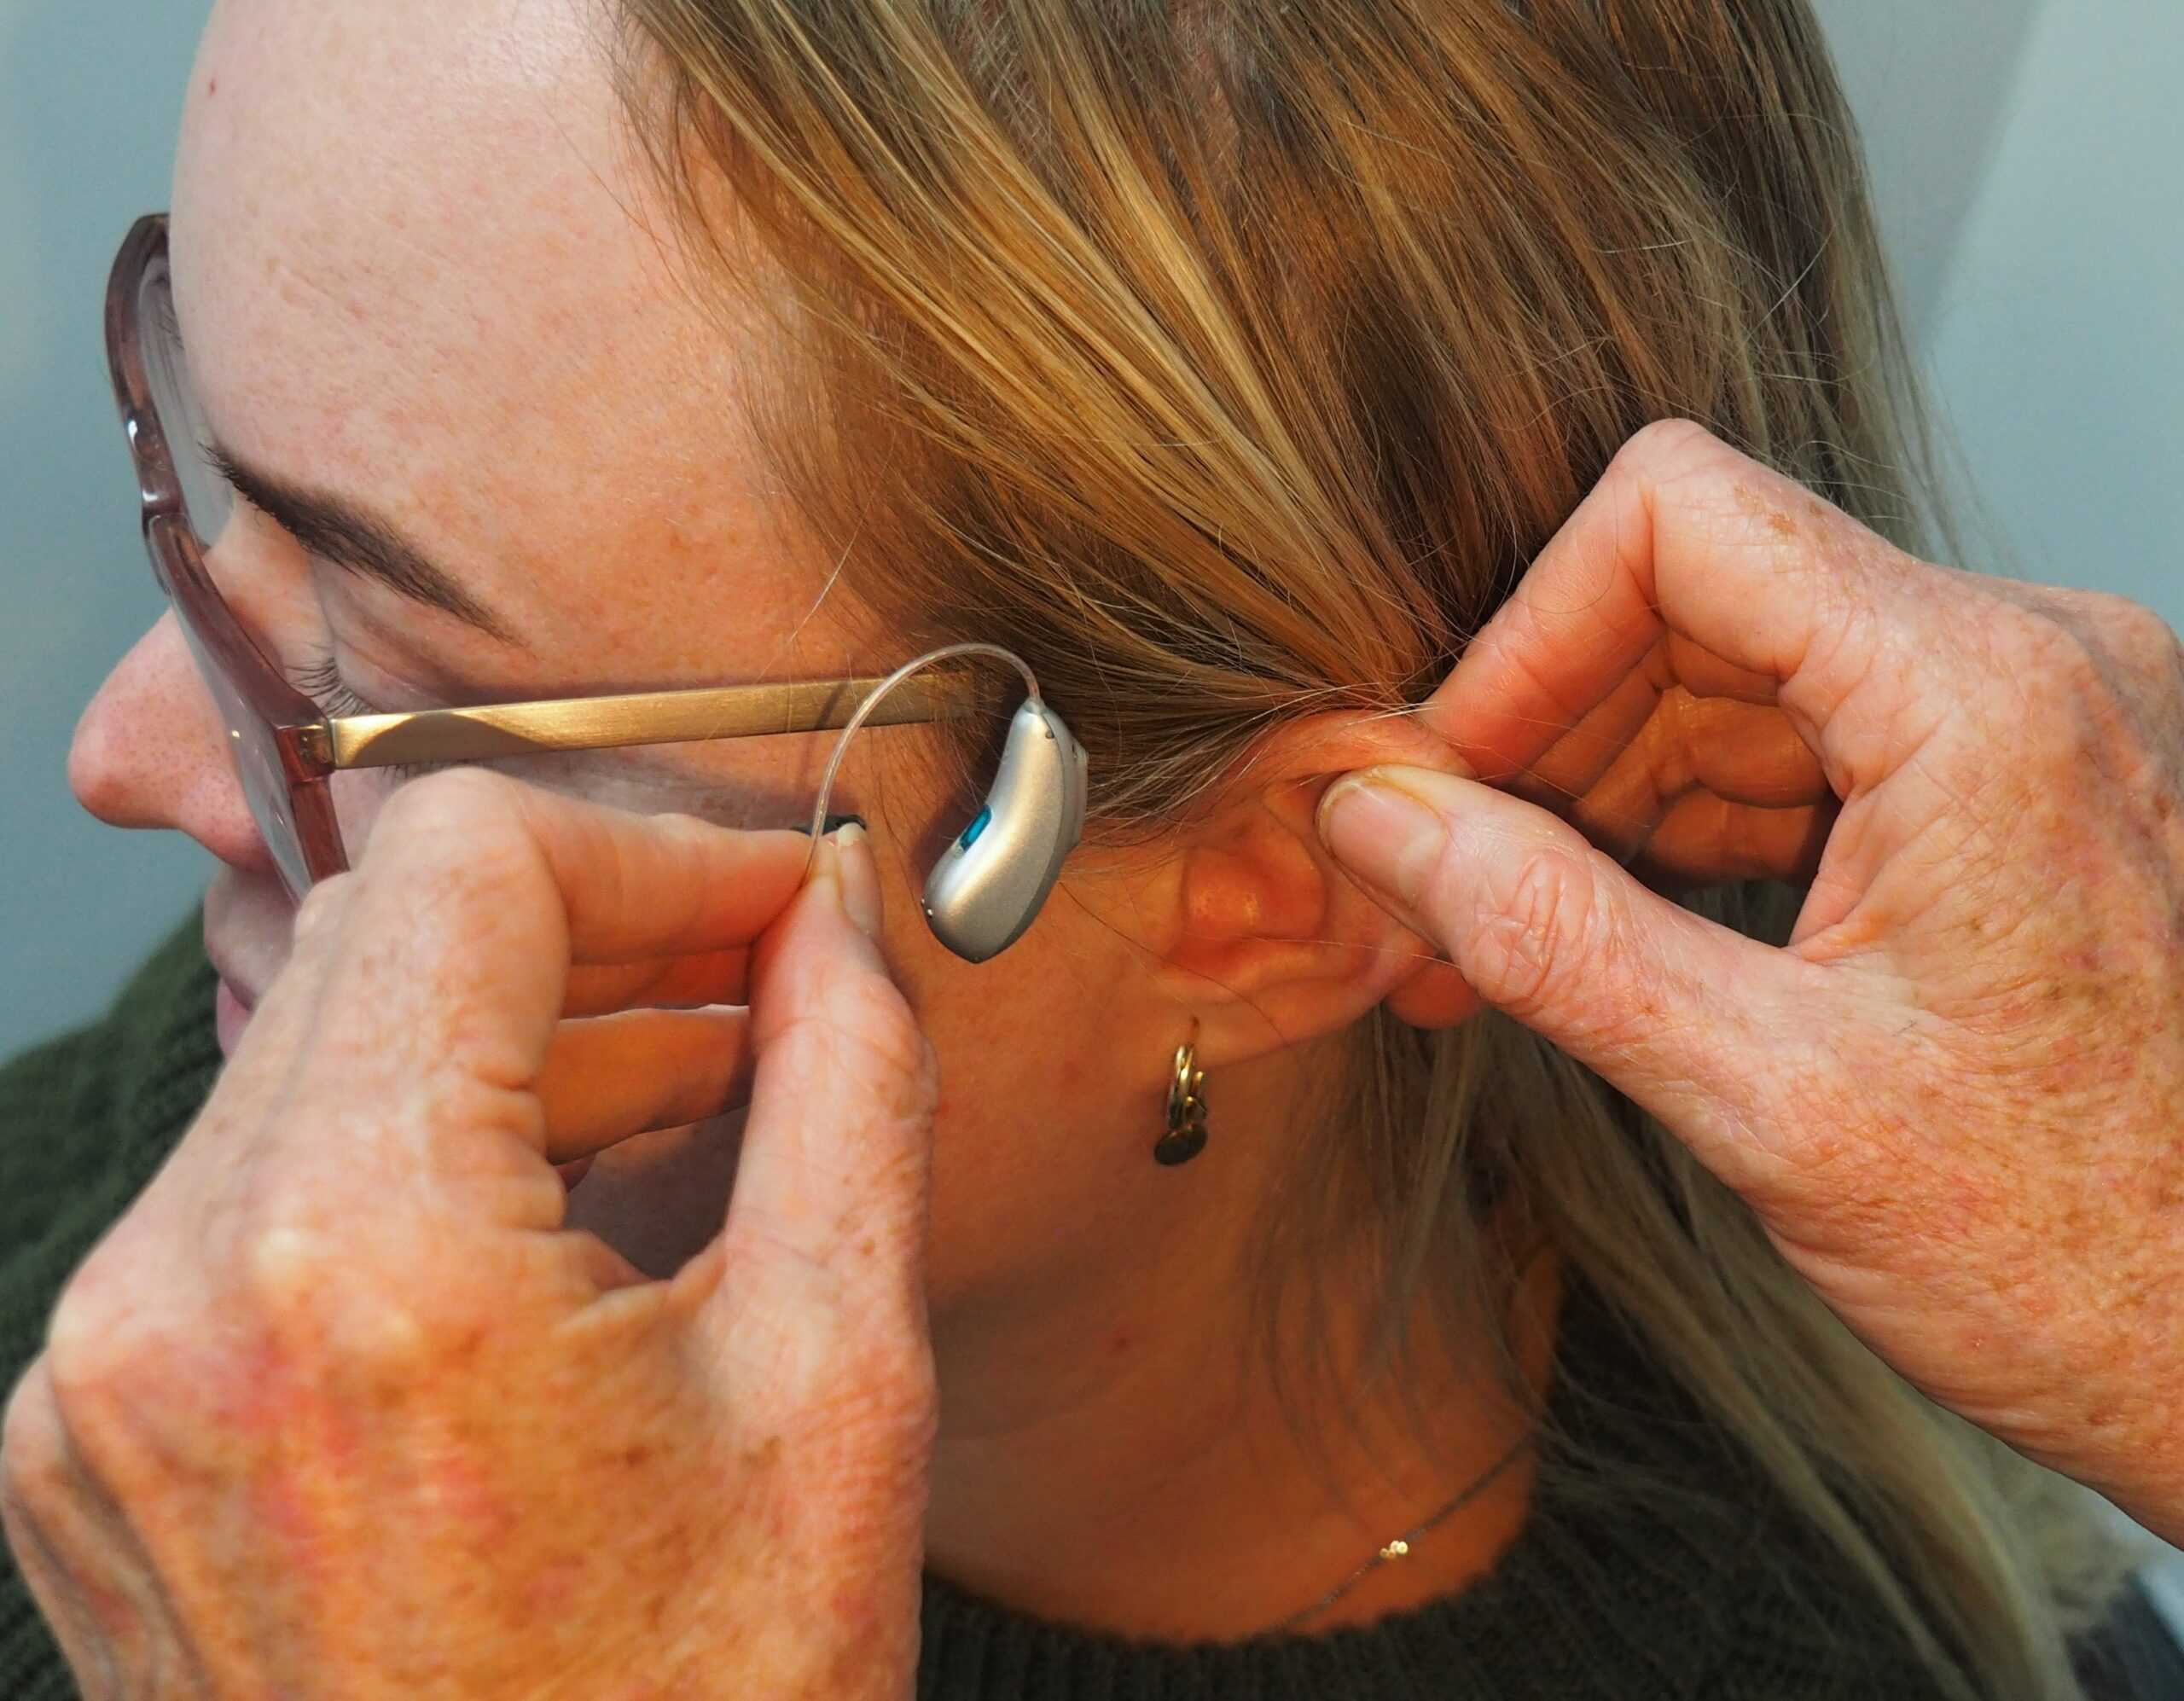
2. Wipe down your hearing aid
Wipe down the exterior of your hearing aid with your dry microfiber cloth.
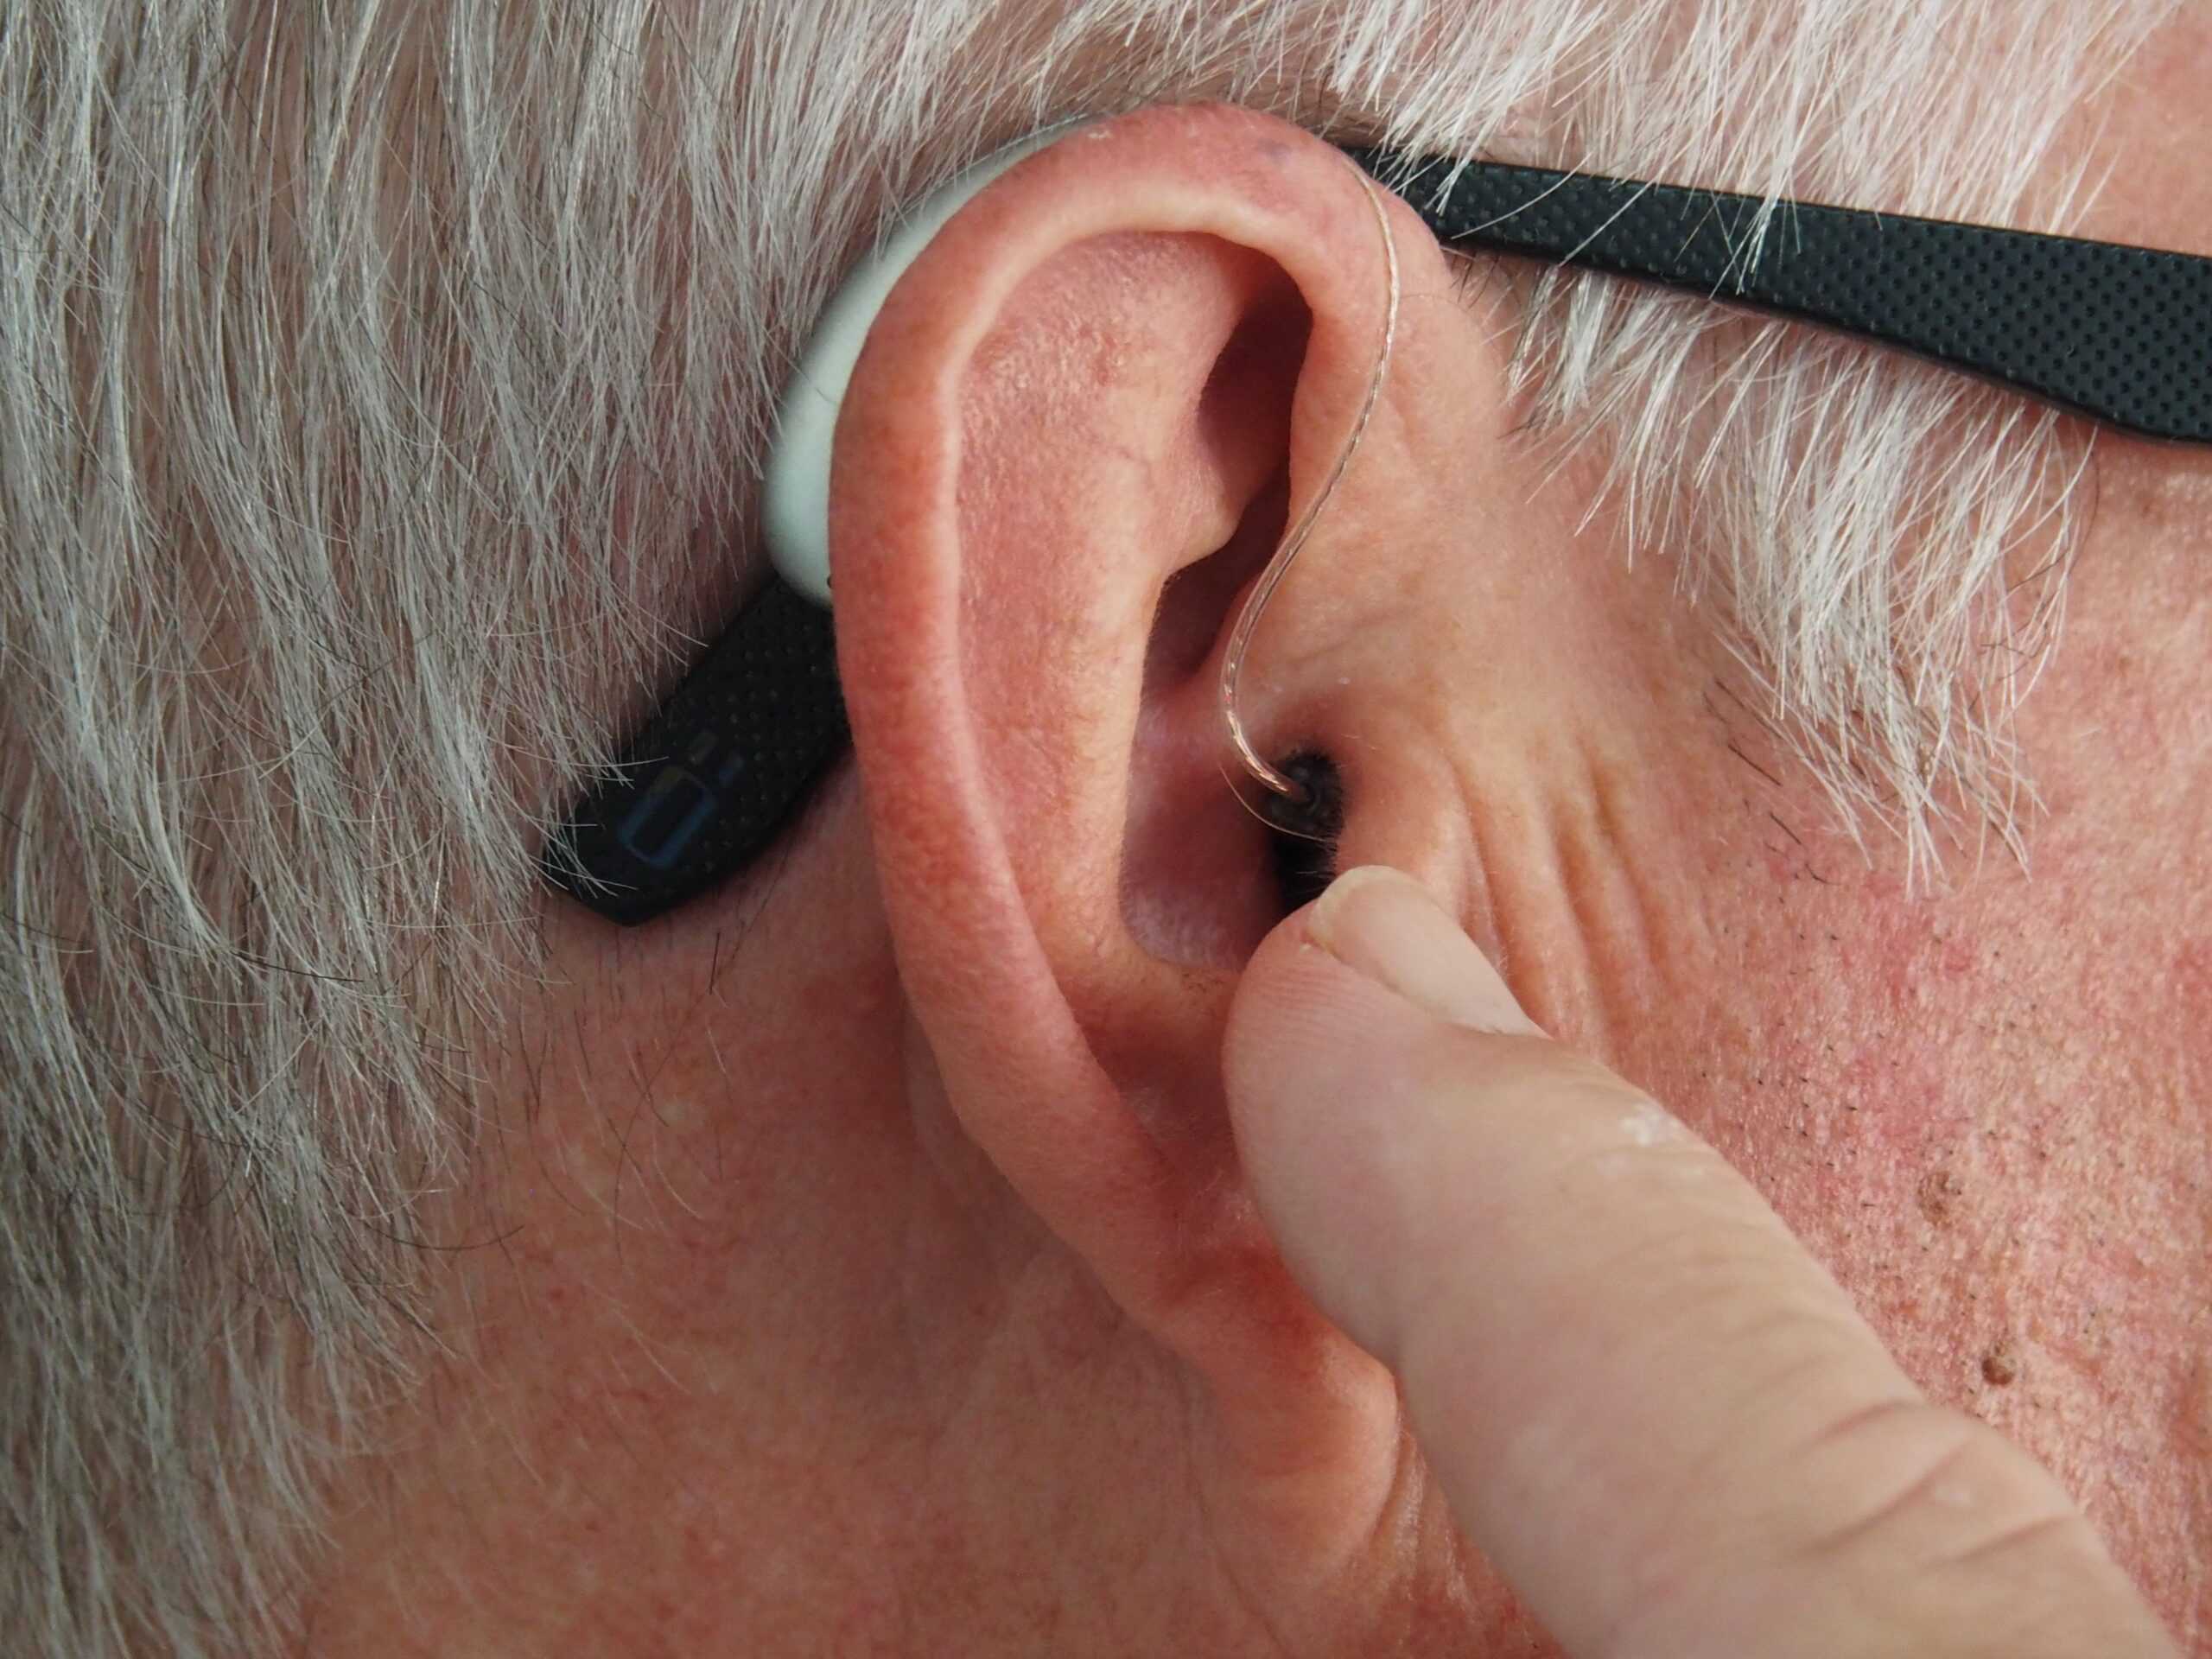
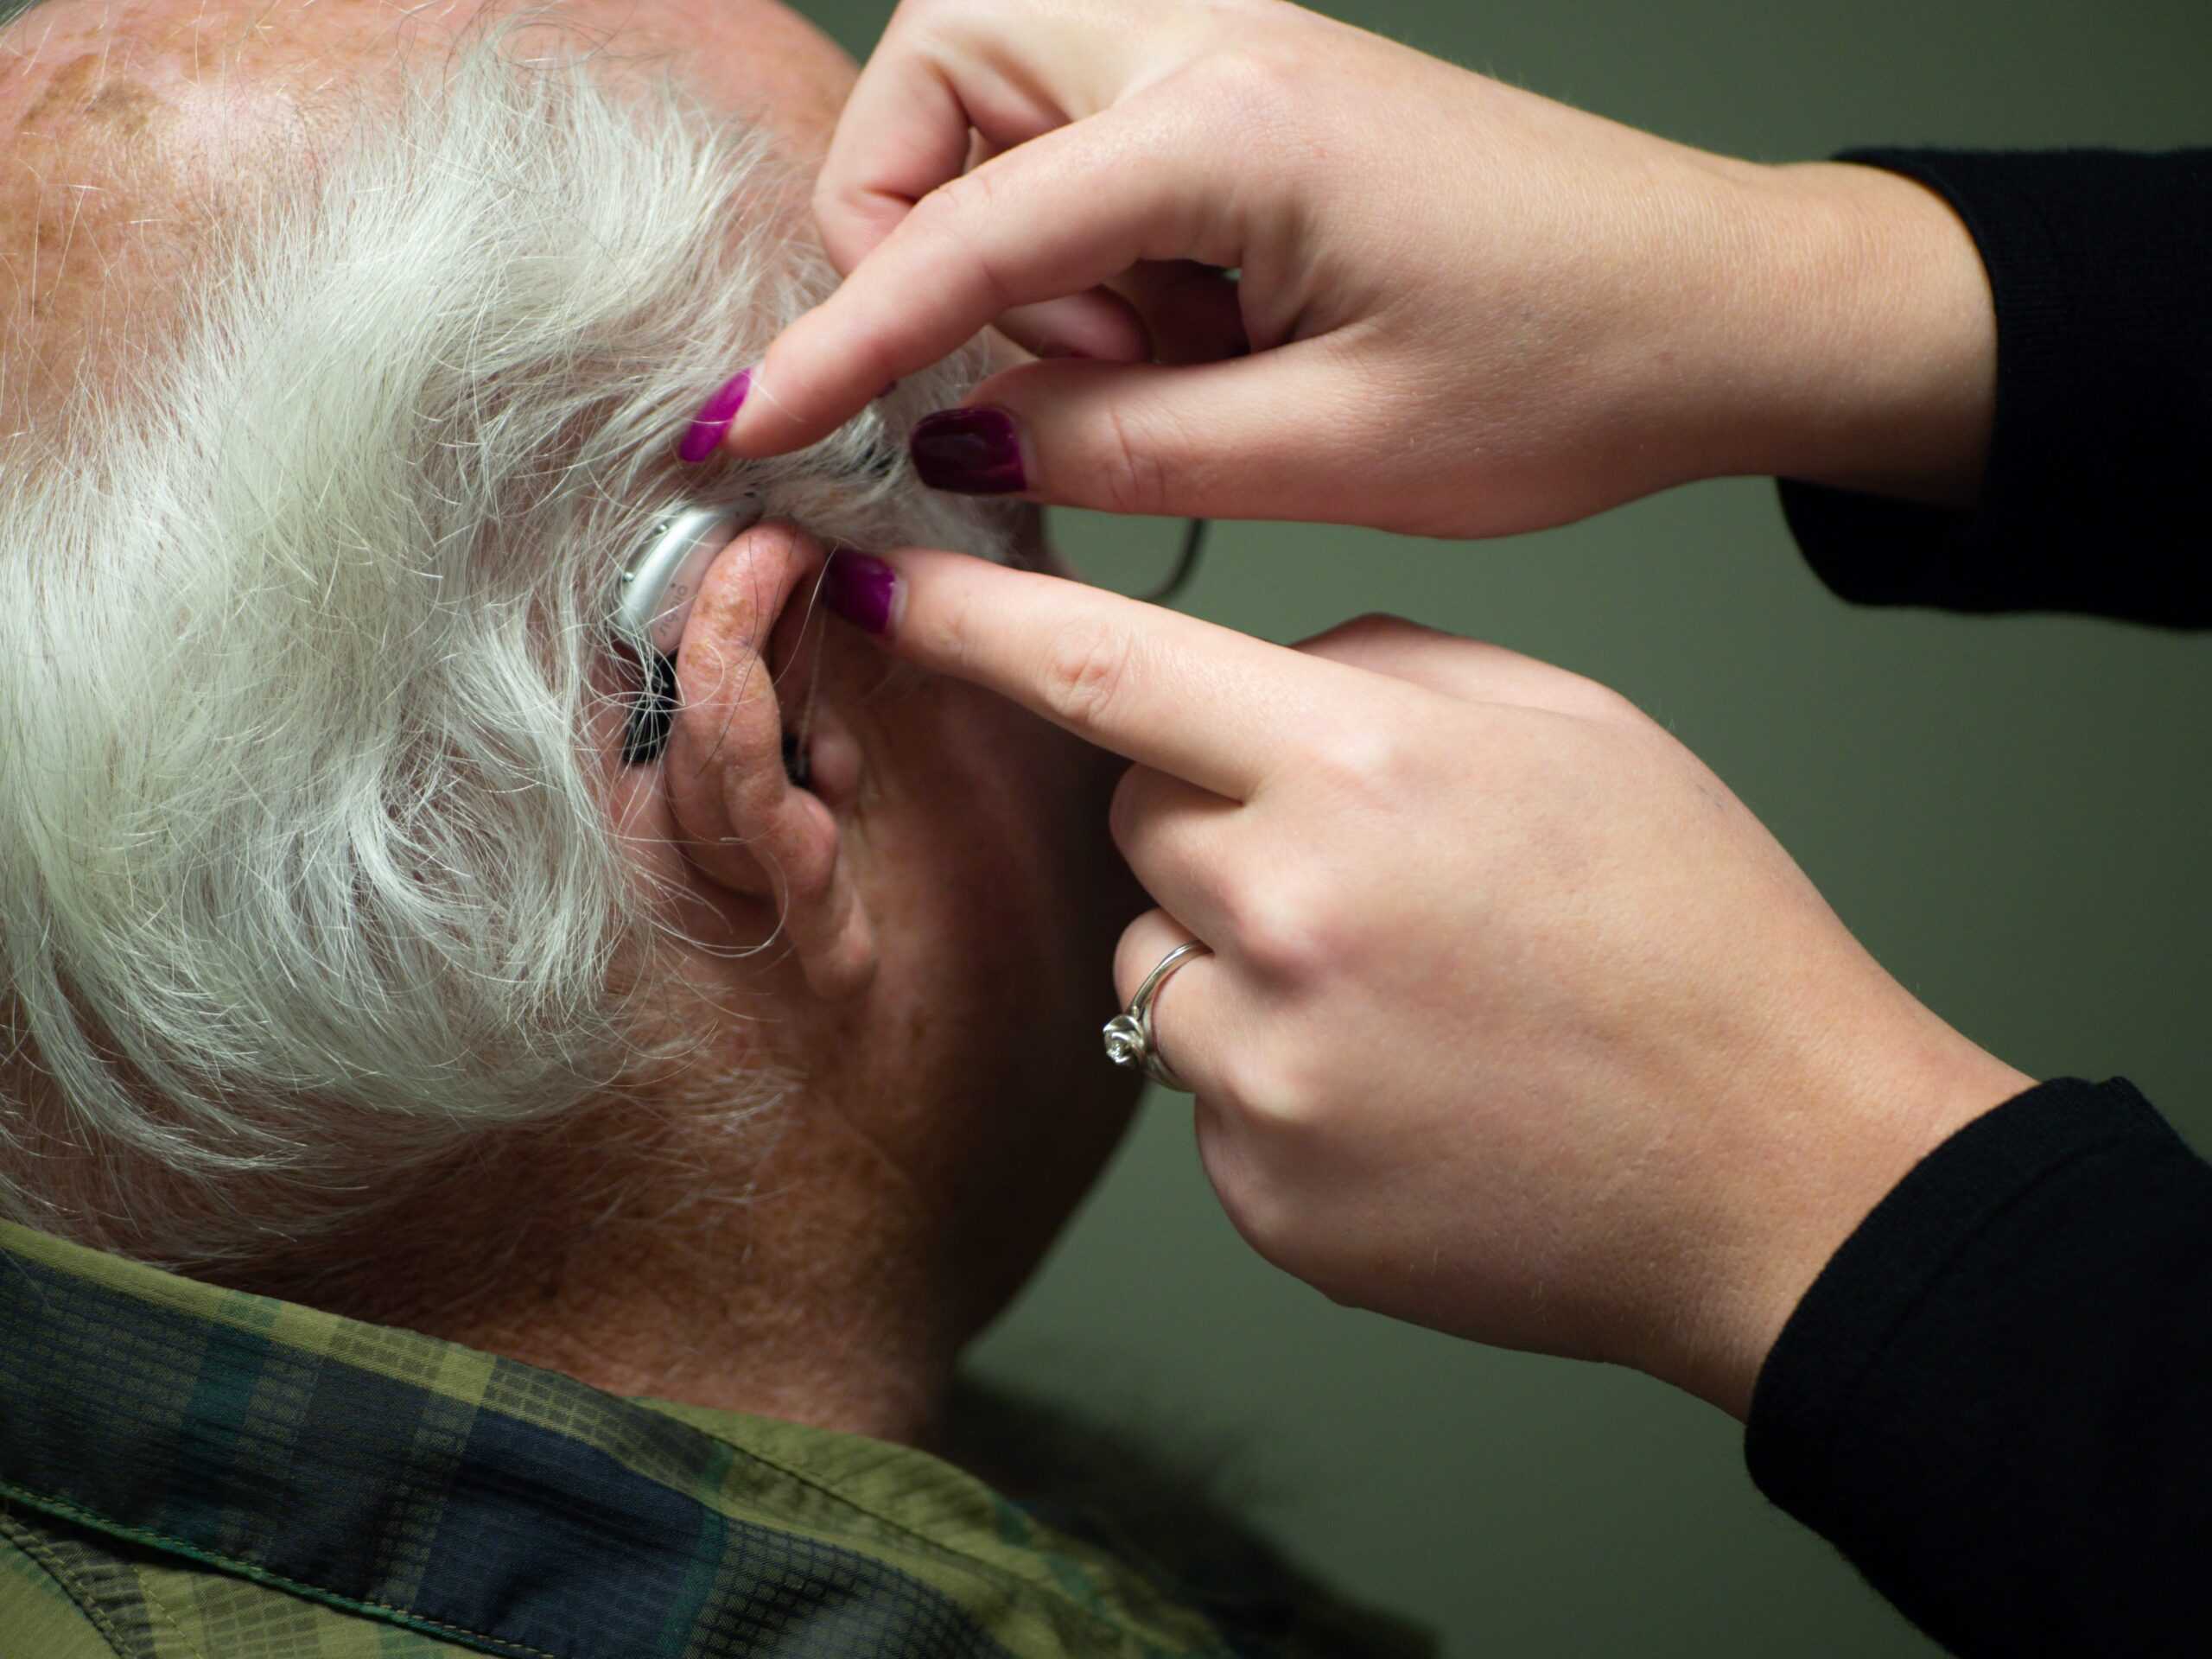
3. Remove dirt and wax buildup
Use your wax pick or loop to carefully remove any wax buildup in the hearing aid’s crevices. Move slowly and gently when doing this to prevent breaking individual pieces of your device.
Next, gently brush away any dirt or debris that may have accumulated in the hearing aid’s microphone or speaker using a cleaning brush. Press just firmly enough to get the dirt off.
4. Apply disinfectant with the extra cloth
Use the hearing aid disinfectant and extra cloth to sanitize your device, adhering to your hearing aid’s and the disinfectant’s instructions.
This will kill any bacteria that may be present on the device. If you find scuff marks while cleaning, gently rub them away. If you can’t get rid of them, you may need to order a replacement part.
Avoid getting any disinfectant in your eyes, mouth, ears, or nose while cleaning. Hearing aid disinfectants are made with surfactant, which may cause skin irritation that’s difficult to get rid of. Wash your hands thoroughly when done.
5. Let your hearing aid air dry
Allow your hearing aid to air dry on a clean cloth or paper towel for at least one hour before turning it back on. This prevents using damp equipment and encountering more ear health issues.
Common mistakes made while cleaning hearing aids
Cleaning your hearing aid at home is a simple process, but you may still make a mistake. Here are the most common blunders to learn from and avoid:
To ensure your hearing aid stays in good condition, it’s important to clean it regularly. However, there are some common mistakes to avoid.
Be careful when choosing a cleaning solution – water and harsh chemicals can damage your hearing aid’s microelectronics. Instead, use substances that are specifically approved for your hearing aid and in the correct amounts.
Avoid using supplies that are too harsh, like coarse steel brushes or bleach, as these can damage the delicate components of your hearing aid.
Make sure to clean your device often enough to prevent the buildup of wax and debris in its crevices. It’s recommended to schedule regular cleaning time at least every other week, if not weekly.
What to do if you need help cleaning hearing aids
You may encounter some difficulty while cleaning your hearing aid. Sometimes the difficulty comes from the small size. In other cases, something went wrong during the cleaning process. Pause and think about whether or not the issue requires repairing a part or replacing it.
If your aid’s speaker can’t be cleaned with our process or one piece has gotten stuck in another, that’s worth replacing. Replacement parts arrive at your doorstep within a few days and include handy instruction booklets. If you try your hearing aid again after cleaning and it doesn’t work correctly, it may need repair.
Remember, the older your device is the harder it can be to obtain replacement parts. If you need expert guidance, a new hearing aid is a phone call away.
Conclusion
Regularly cleaning at home is central to maintaining hearing aid functionality.
Commit to a regular cleaning schedule and soon you’ll have total peace of mind knowing your hearing aid provides impeccable results daily.
Whether you need to upgrade your hearing aid or purchase one for the first time, our knowledgeable hearing specialists can help.
Book a consultation now and get one-on-one help for optimal hearing.


Subscribe to our mailing list
Be the first to hear about latest news, content, and more by subscribing to our mailing list. Check your inbox for a confirmation email!

